Did you know you can convert your mountain bike to a gravel grinder? You do not have to buy a gravel bike if you already own a mountain bike. If want to relocate to a milder terrain, you can convert the latter into the former through just a few steps. It would be an economical move not to discard your mountain bike for a new gravel grinder.
Therefore, you can continue to use your mountain bike on pedestrian pavements and other gentler terrains. The steps are necessary for this conversion form the basis of the discussion in this guide. Read About: What Is A Gravel Bike? Everything You Need To Know Explained!

How To Convert Mountain Bike To Gravel Bike – Step By Step
Step 1: Gearing
You can begin by altering the gearing system to suit the gravel bike requirement. Gravel bikes tend to operate faster. Therefore, they need more gears than their mountain counterparts. Converting a mountain bike to gravel grinder will require you to upgrade the gears.
Hence, the first step requires you to increase the number of gears to the already existing amount on your mountain bike. Even when you have to increase the number of gears, do not forget to maintain its ratio at 2:1. Both bikes use almost the same constant ratio.
Step 2: Suspension
You need to do more than just increasing the number of gears. After upgrading maximum speed, the next thing you need to do is to raise the suspension. You realize that this is a necessary move, especially since gravel bikes typically travel in areas and paths that are full of stubborn obstacles such as rocks and pebbles.
Since mountain bikes are designed for rough terrain and rough terrain only, to make it a gravel grinder you need to make it more versatile. Raising the suspension does that trick better. But how does it work? When you make this change, it accords a comfortable clearance between your bike and the ground level. That is it.
Step 3: Tires
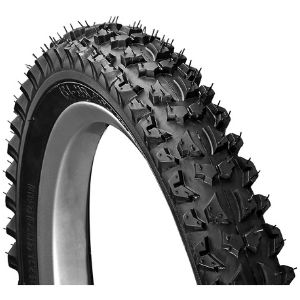
Next, you have to change the tires by swapping the old ones for new ones. Make sure you install tires that can serve the new purpose. Mountain bike tires are usually thicker, wider and heavier. Their design is suited for rough and winding roads or paths. On the contrary, gravel bike tires are typically narrow and agile.
Therefore, if you expect your mountain bike to serve as a gravel bike, you need to change the tires for the best outcome. Swap the thick heavy mountain bike tires with lighter more flexible ones for better gravel performance. Likewise, make sure the new ones are narrower for maximum agility while you are on the move.
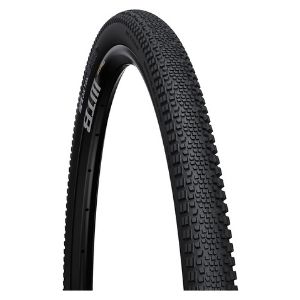
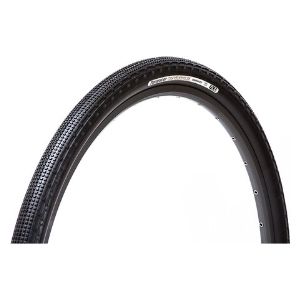
Gravel Tire You Can Choose:
Image | Name | Price |
|---|---|---|
 | ||
 | ||
 | ||
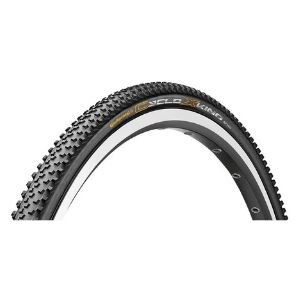 |
Note that we chose the above-mentioned tires after doing some practical research. Both of them did good performance. So, you can choose any of the tires without any hesitation.
Step 4: Shock Absorption
Gravel bikes need tougher shock absorbers than mountain bikes. That is why converting a mountain bike to gravel bike requires that you also change the shock absorbers or simply make them tougher.
Gravel bikes are typically designed to tackle obstacles such as gravels, rocks, pebbles, and dirt. A typical mountain bike's shock absorbers may not survive all the roughness that such terrains present.
Replacing the mountain bike's shock absorbers or making them tougher would be a substantial move towards converting the bike to a gravel grinder.
Step 5: Handlebars
Even the handlebars for these two bikes differ to a certain extent. Thinking of it, controlling a gravel grinder must be a little bit more complex than controlling a mountain bike. Mountain bikes usually have flat handlebars, which is not suitable for their gravel counterparts.
You can make a little change to the flat handlebars by adding bar-ends to allow riders to change their hand and arm position. You could also add gel pads to reduce vibration on bumps and other rough terrains.
These clear tacky strips are laid handlebars and under the bar tape. They are not visible once they have been installed but comfort can never go unnoticed.
Step 6: Breking System
You will also have to upgrade the braking mechanism when converting a mountain bike to a gravel grinder. Since gravel bikes are a little bit lighter than their mountain counterparts, the former typically run faster than the latter. Gravel bikes need a braking system that is sharper and more responsive.
Once you install the right disc brakes, it will last longer without wear and tear. Gravel bike brakes tend to survive longer since the bike's weight is low and therefore less wear and tear are experienced at the brake discs. Its brakes also endure repeated tears.
Step 7: Offload Unnecessary Accessories
The main idea here is to make the bike as lightweight as possible. Converting a mountain bike to a gravel grinder might not be an easy task, but when you understand the principles of both bikes, you can easily find your way home.
For the gravel bike to be able to make it on this challenging environment laden with gravel, rocks, and pebbles, you have to make it lighter. You have to shed off unnecessary accessories to make a mountain bike capable of handling the rough terrain.
Frequently Asked Question (FAQs)
Q: Does it cost much to complete this conversion?
A: Converting a mountain bike to a gravel grinder is rather a DIY activity and is, therefore, a low-cost task. Even if you have to hire a professional, they can do it at a small fee.
Q: Can the converted gravel bike still take on the mountain again?
A: No. Gravel bikes are designed for normal pedestrian roads. They are not suited for mountainous terrains.
Q: Can I reconvert my gravel bike to a mountain bike?
A: Yes. You can complete the re-conversion but the new mountain bike will be very weak. It cannot get back to its original form.
Q: Can I DIY the re-conversion or do I need a professional to do it?
A: If you can complete the first conversion, this second one should not be a problem at all.
Final Verdict:
Converting mountain bike to gravel grinder may not be such a difficult process anyway. With the above-mentioned steps, you can find your way home if you desire to DIY the process. You have to assemble the right tools for the activity to be as successful as you would expect it to be. If you are not sure if you can do it yourself, you can hire a professional to do it for you. Since the processes are not that complex, hiring a professional is usually less costly too.
Relevant Resources:

Hello Guys! I am John Reese, a professional biker and my hobby is biking! I have been biking for last 10 years and I love using bikes while outing as well. Based on my experiences with the different type of bikes (mountain bikes, road bikes and hybrid bikes); I am sharing my opinion about various bikes so that a beginner can get started right away. Happy reading!