If you are a bike owner or a rider, a bicycle brake is one of the most important features designed and built on the bicycle. The brakes are a safety feature built on a bicycle to slow down or stop the bicycle when a need arises when you are riding your bicycle.
If the brakes of a bicycle do not work well, then the safety of the rider is compromised and can cause fatal injuries if not careful. It is the responsibility of the bicycle rider to always ensure that the brakes system of the bike is at the optimum performance before going out for a ride. One can keep himself safe by making routine checks on the brakes of the bicycle.
The most common issue with the bike brakes system is the rubbing. Here you will learn step by step on how you can fix this issue without taking your bicycle to the technician to repair it. The process is easy to do for a beginner and very cost-efficient as you will need on a few simple tools to handle the adjustment of rubbing on your bike to always ensure your safety.
Read Our Popular Review Of Best Mountain Bikes Under $500

Adjust Bike Brakes Rubbing - 10 Effective Steps
1. Checking On The Brake Pads:
The brake pads are pads clamped down on the front and the back tire of your bicycle when you squeeze the brake lever. It is very important to check on the condition of the brake pads always before going for a ride on your bike. Worn out brake pads tend to have a very smooth edge and the grip on the tire will not be tight and this may cause an accident if not taken care of.
Pro tip: The brake pads consist of a wear line on them to alert you as a rider when it is necessary to replace the current one with a new one. If the brand of brake pad has no wear line, there will be markings by grooves by the sides of the pads instead.
We Recommend: Bike Brake Pads Set For Road & Mountain Bike
2. Squeeze The Brake Lever To See The Grip Of The Brake Pads:
To test and know if the rubbing of the brake pads is efficient you will have to squeeze on the brake lever so that you can know the exact position where the pads grip onto. For a properly functioning brake system of a bike, the pads should hit the Centre of the rim at the same time, with an equal amount of space above and below the pad. If the brake pads wind up hitting above or too low they will come into contact with rubber part of the tires or the spokes.
Pro tip: To be able to see the whole operation accurately crouch down as you are squeezing the brake lever. At this angle, you will view the position of the pads clearly.
3. Loosening The Brake Pads:
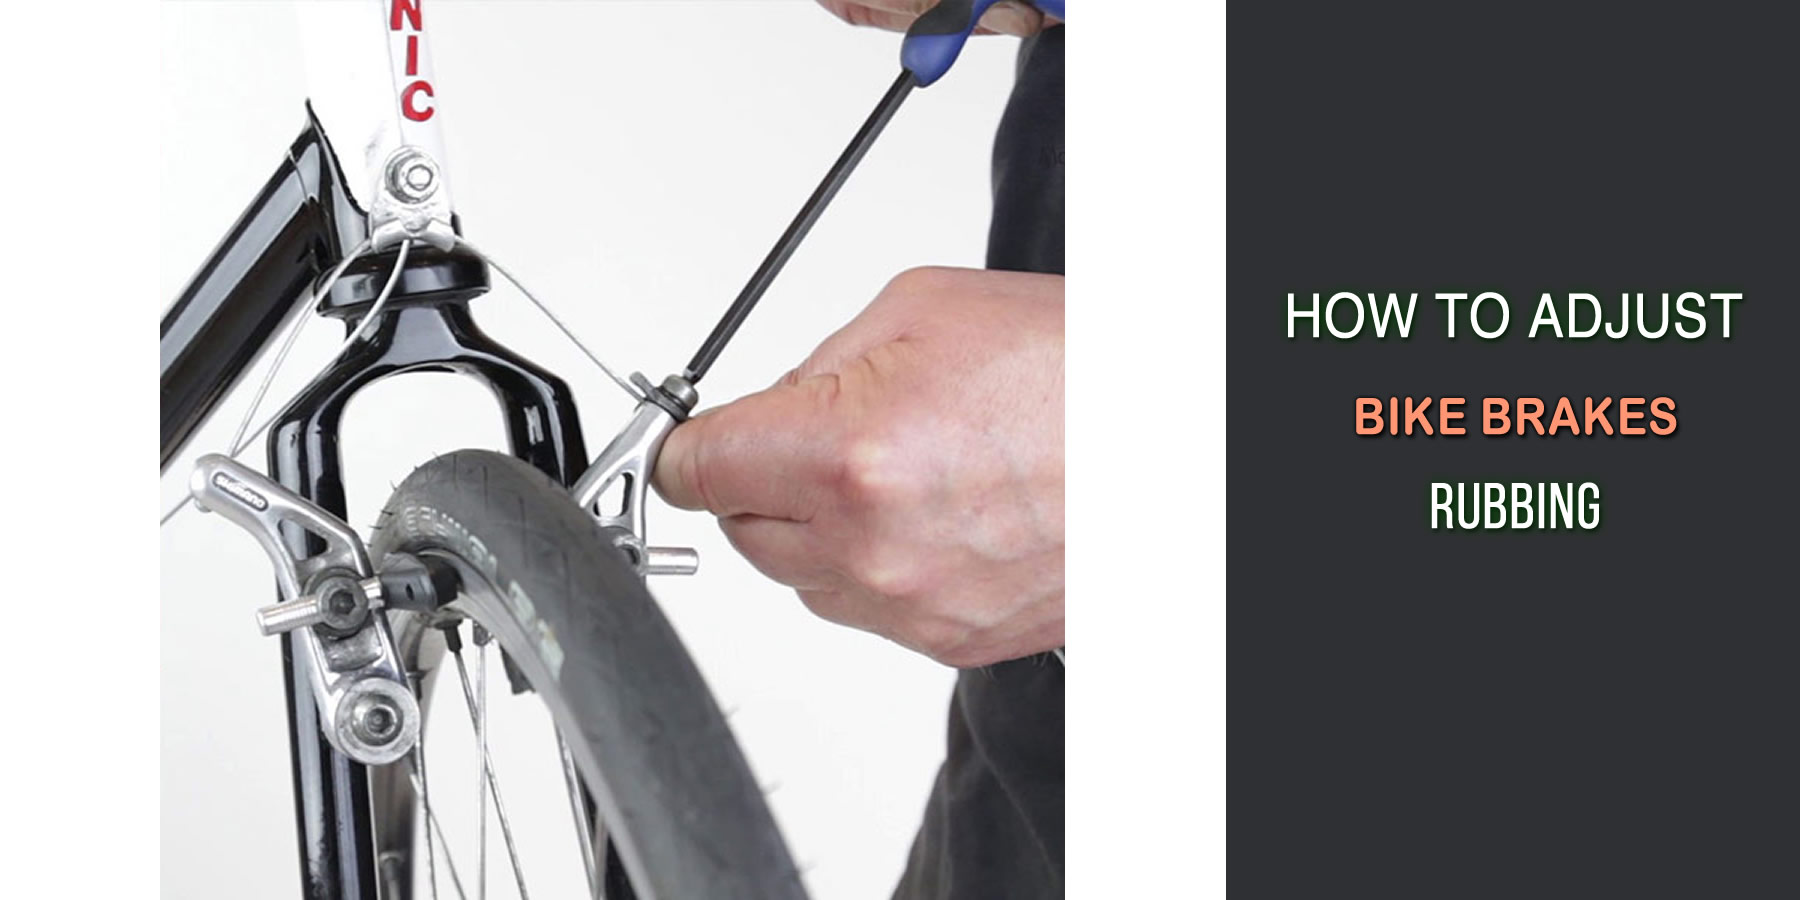
If the brake pads on your bike are not hitting on to the right position you will have to do a simple operation of adjusting the pads. For this type of work all you need is an Allen wrench. Take the Allen wrench and place it on the bolt holding the pads in place. Turn the Allen wrench counterclockwise to loosen the bolt.
Pro tip: While turning the Allen wrench counterclockwise do not loosen the bolt all the way so that the brake pads come out. Returning the brake pads would be a tedious operation.
4. Centre The Brake Pad And Re-Tighten The Bolt:
Once you have loosened the bolt you can easily adjust the position of the brake pads. If the brake pads were too high or too low toy can easily move them in the opposite direction until they are centered. The position of the brake pad should avoid getting into contact with rubber of the tires and the spokes.
Once you have found your centered position hold the brake pad against the rim of the bike with your thumb to re-tighten. Place the Allen wrench on the bolt and turn the bolt in a clockwise direction until the bolts of the brake pads are fully tightened. Release the brake pad and check if not properly centered readjust to find the correct position.
Pro tips: To get the centered position of the brake pad crouch down to get a good look of the brake pad.
Ensure that the force applied by your thumb against the brake pad is strong to avoid any tilting when tightening the bolts. By applying great force, you will not need to readjust as the brake pad will remain centered when the bolt has been tightened.
5. Tightening The Brake Cables:
Other than the brake pads the other part of the brake system that can affect the bike brake rubbing efficiency is the brake cables. The first step when checking out the brake cables if they are efficient is by conducting a test on tightness. To perform the test, you will need to pull the brake lever. If the brake lever leaves a space of about 1.5 inches from the handlebar then the cables are fine but if the brake lever touches the handlebar then the brake cables are loose.
Pro tip: Put yourself in an upright comfortable position. Apply an adequate amount of pressure when tightening your grip against the brake lever and the handlebar.
6. Minor Cable Adjustments:
In some cases, the brake cable might be slightly loose and only minor adjustments are needed to take care of this issue for the cable to become tight again. On the brake lever, there is a part that attaches to the cable known as a barrel adjuster. Turning the barrel adjuster counterclockwise to loosen it might just be the remedy to fix this minor issue.
Pro tip: After slightly loosening the barrel adjuster, test the brake lever if it has become tighter. If the cable is still loose then you will have to adjust on the caliper.
7. Unscrewing The Caliper:
When your efforts of tightening the brake cable on the barrel adjuster have failed, you will have to open the caliper on the brake system to do adjustments on your brakes rubbing. For this task, you will need an Allen wrench and put it in the bolt that is in the caliper which is the mainframes of the brake pads attached. Turn the Allen wrench counterclockwise to loosen the bolt.
Pro tip: Avoid unscrewing the bolt all the way. Turning the Allen wrench 2 to 3 times is enough to loosen the bolt on the caliper.
8. Tightening The Cable On The Caliper:
After loosening the bolt on the caliper, it will be easy for you to jerk the cable outward. Use your fingers to hold it in place, as you pull the cable outward the brake pads should tighten against the rim of the bike.
Pro tip: You would want the brake pad to be tight enough that you feel some resistance against the tires but not too tight that the tire does not move. If the tire of the bike cannot move pull less hard on the cable so that it does not become too tight.
9. Tightening The Bolt Holding The Brake Cable On The Caliper:
While still holding your cable outward on the caliper of the bike, take the Allen wrench and place it on the bolt. Rotate the Allen wrench 2 or 3 times in a clockwise direction. The cable should be secure and in place, once the bolt is tightened.
Pro tip: Make sure that the brake pads are on the tires when tightening the bolt on the caliper.
10. Tightening The Barrel Adjuster:
Turn barrel adjuster on the handlebars that you had loosened in a clockwise direction so that it becomes completely tightened. This makes the clamped brake pads lose.
Pro tip: After tightening, ensure that the brake pads are loose from the tires and centered. Test cables again by tightening your grip on the handlebar and the brake lever.
Frequently Asked Questions(FAQs):
Question: why are my brakes rubbing all the time?
Answer: the most common reason is the caliper alignment. The user must take action and do the necessary adjustment to avoid premature wear on the pads.
Question: What tools are needed to adjust bike brakes rubbing?
Answer: the only tool needed to do adjustment is the Allen wrench.
Question: what are the symptoms of a bad brake caliper?
Answer: the most common sign is the squeaking and squealing sound.
Question: can you ride with a stuck caliper?
Answer: the ride will be a little stressful and tiresome as the brakes will be engaged at all times.
Question: why do you need to replace brake pads in pairs?
Answer: This is important to keep the braking power of the wheels balanced.
Conclusion:
Knowing how to adjust bike brakes rubbing is important for every rider's safety. With just one simple tool one can make various checks on his bike to ensure that he rides safe.
Relevant Resources:

Hello Guys! I am John Reese, a professional biker and my hobby is biking! I have been biking for last 10 years and I love using bikes while outing as well. Based on my experiences with the different type of bikes (mountain bikes, road bikes and hybrid bikes); I am sharing my opinion about various bikes so that a beginner can get started right away. Happy reading!

